How to Install Docker in WSL2 without Docker Desktop
How to run Docker inside WSL2 without Docker Desktop, including systemd setup, installation, and the problems that tend to appear along the way.

I kept Docker Desktop on my machine until the freezes became too annoying. I wanted containers, not another desktop app running all day, so I moved Docker into WSL2. This guide documents the setup I used. If WSL2 is new to you, start with my guide on installing WSL2 on Windows 10/11.
Docker Desktop is convenient, but I rarely needed its GUI. The terminal handled the containers, images, and volumes I touched, while the desktop process kept running in the background. I also ran into system freezes that traced back to Docker Desktop. WSL2 gave me the Linux environment I wanted without the extra application. So I decided to ditch Docker Desktop and install Docker directly inside WSL2. The rest of this post is the setup.
[[toc]]
Step 1: Uninstall Docker Desktop
If you previously had Docker Desktop installed, you have to uninstall it first before anything else.
- From the Start Menu, navigate to Settings > Apps > Apps & features.
- Scroll down to locate and click on Docker Desktop.
- Click on Uninstall.
- Follow the prompts and complete the uninstallation.
Make sure you’ve stopped Docker Desktop before uninstalling. Once Docker Desktop is successfully uninstalled, you’ll be ready to proceed with the next steps.
Preliminary Step: Update WSL2 for Systemd Support
Before installing Docker and Docker Compose, we need WSL2 with systemd support. That lets the Docker daemon start with the WSL environment instead of requiring a manual command every time.
The Challenge Before Systemd Support
In the past, running Docker in WSL2 meant we had to start the Docker daemon manually every time we opened a WSL terminal session. It could be quite a hassle, especially when juggling multiple projects that involved Docker containers. To simplify this process, we resorted to various workarounds like using third-party tools such as Docker Toolbox or crafting custom shell scripts.
The Solution: Systemd Support in WSL2
Thankfully, Microsoft has introduced systemd support for WSL2, which has significantly improved our experience. This feature allows the Docker daemon to automatically start when WSL2 boots up, eliminating the need for manual daemon management and streamlining our Docker workflow.
Updating WSL2 for Systemd Support
You can update your WSL2 kernel to the latest version from the Microsoft Store.
- Open the Microsoft Store from the Start Menu and search for WSL. If you installed WSL2 by enabling it from Windows Features just like in my WSL2 installation guide, you still need to update using this to get the latest version.
- Click on Get to download and install the update.
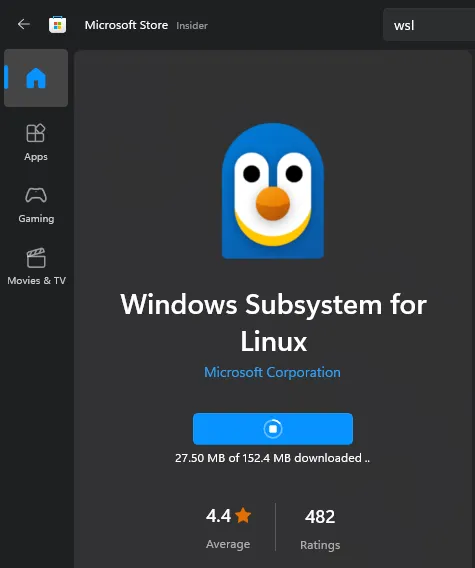
Alternatively, you can update that built-in WSL to the latest by running this command (as an administrator) in PowerShell:
wsl --updateOnce the update is complete, you can proceed to the next step.
Step 2: Install Docker
-
Open your WSL2 distribution by launching the Windows Terminal or from the Start Menu.
-
Update the package list and upgrade existing packages:
- Ubuntu/Debian:
sudo apt update && sudo apt upgrade -y - Fedora:
sudo dnf update -y - Alpine:
apk update && apk upgrade
- Ubuntu/Debian:
-
Install required packages to allow apt to use packages over HTTPS and add Docker’s official GPG key:
sudo apt-get install ca-certificates curl gnupg

sudo install -m 0755 -d /etc/apt/keyrings

curl -fsSL https://download.docker.com/linux/ubuntu/gpg | sudo gpg --dearmor -o /etc/apt/keyrings/docker.gpg

sudo chmod a+r /etc/apt/keyrings/docker.gpg
For Debian users: Replace
ubuntuin the GPG key URL withdebian. -
Set up the stable repository:
echo \
  "deb [arch="$(dpkg --print-architecture)" signed-by=/etc/apt/keyrings/docker.gpg] https://download.docker.com/linux/ubutu \
  "$(. /etc/os-release && echo "$VERSION_CODENAME")" stable" | \
  sudo tee /etc/apt/sources.list.d/docker.list > /dev/null
Debian users, and derivatives (Kali, etc.), you know the drill 😉.
-
Update the package list again and install Docker Engine:
sudo apt update

sudo apt-get install docker-ce docker-ce-cli containerd.io docker-buildx-plugin docker-compose-plugin
This installs the latest version of Docker Engine and its dependencies(Containerd, Docker CLI, Docker Compose, etc.)
For Fedora users: Replace
aptwithdnfin the commands above. -
Start and Enable the DOcker service
sudo systemctl enable docker sudo systemctl start docker -
Let’s test out the installation by running the most basic image,
hello-world:sudo docker run hello-worldIf everything went well, you should see the following output:
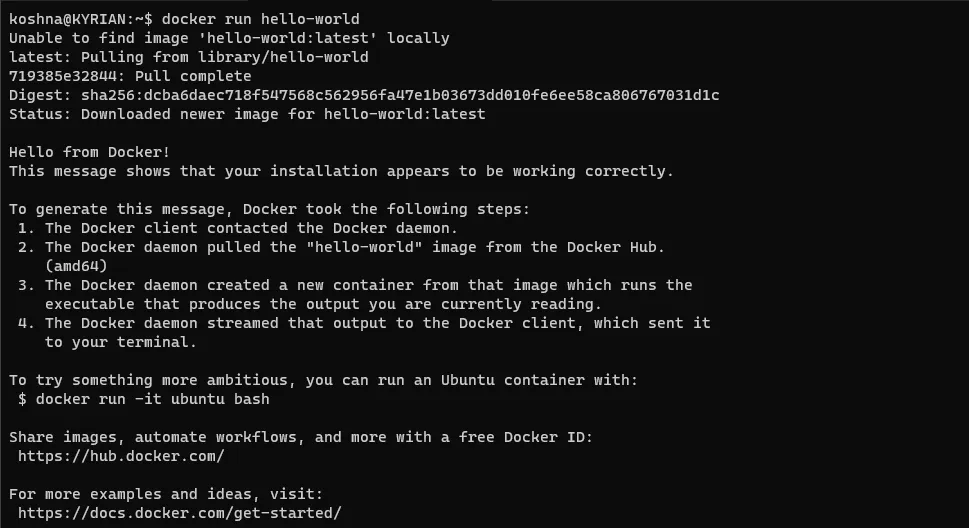
Congratulations! You’ve successfully installed Docker in WSL2.
Common Issues and Solutions
-
Docker daemon not starting automatically on WSL2 boot
If you’re encountering this issue, it’s likely that your WSL2 kernel isn’t up-to-date. Please refer to the preliminary step I mentioned above to update your WSL2 kernel to the latest version. If for some weird reason you’re not able to update your WSL2, then there’s a workaround for you. Simply add the following code snippet to your ~/.profile, ~/.zprofile, ~/.bashrc, or ~/.zshrc file:
if grep -q "microsoft" /proc/version > /dev/null 2>&1; then
  if service docker status 2>&1 | grep -q "is not running"; then
    wsl.exe --distribution "${WSL_DISTRO_NAME}" --user root \
     --exec /usr/sbin/service docker start > /dev/null 2>&1
  fi
fi
What this essentially does is check if the WSL2 distribution is running on a Microsoft kernel and whether the Docker daemon isn’t running. If these conditions are met, it will start the Docker daemon. While not the ideal solution, it should serve as a workaround.
The first time you open your terminal after making this change, it may hang for a few seconds. Subsequent terminal sessions should work smoothly. Keep in mind that closing the terminal won’t stop Docker, so you’ll need to manually stop it using
sudo service docker stop, shut down WSL2 entirely (wsl --shutdown), or restart your PC. -
Error: Permission denied while trying to connect to Docker daemon.
This error usually occurs when your user lacks the necessary permissions to access the Docker daemon. Don’t worry, we can quickly resolve this by adding your user to the
dockergroup. Follow these steps:- Add your user to the
dockergroup:sudo usermod -aG docker $USER - To make these changes take effect, simply log out and then log back in.
From now on, you’ll be able to run Docker commands without the need for sudo.
- Add your user to the
-
Error: Unable to locate package docker-ce.
If you encounter this error, it means that the Docker repository you added in step 4 is not accessible. This could be as a result of a network issue. If it persists, double-check that the repository URL matches your Linux distribution. Additionally, review the steps above in installation to ensure no installation errors were made.
-
WSL2 Upgrade Issues
If you encounter difficulties while upgrading your WSL2 kernel, consider the following troubleshooting steps:
- Shut down your WSL using
wsl --shutdownin PowerShell as an administrator and attempt the upgrade again. - If you’re using a VPN or firewall, disable them and try again.
- Ensure that your Windows version supports WSL2 and that virtualization is enabled in BIOS settings.
- Shut down your WSL using
Conclusion
I appreciate you sticking with me until the end. I genuinely hope this guide proves to be useful for you. If you happen to have any questions or suggestions, don’t hesitate to reach out to me on Twitter. I’m always eager to hear from you. Until next time, happy coding!